Add Custom Fields to Individual or Organization
How To: Add Custom Fields to Individual / Org
AMO has made a recent update to allow Custom Fields to be added to an Individual & Organizations records, this is a very powerful feature that can work in many different ways to make AMO be able to have custom data for your members.
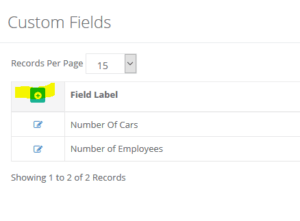
We’ll be using number of cars and number of employees for examples in the below guide.
Please see the below step by step guide:
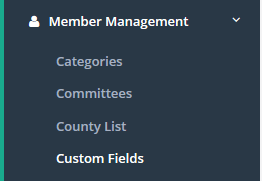
1. Navigate to Member Management >> Custom Fields
2. Click the Green Plus Icon to add a new Custom Field
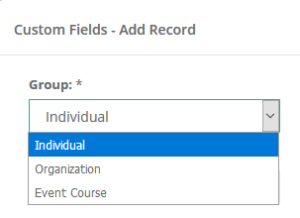
3. A screen will now appear with a number of options to select from, enter a Label for this custom field.
4. Select if this is for an Individual, Organization or Event Course.
4. Select the Field Type, (For our example we select Number for Number of Employees)
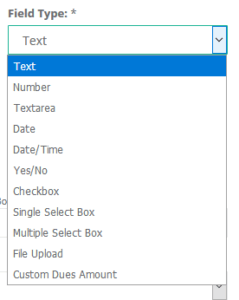
5. Enter options for (For Checkbox, Single Select Box and Multiple Select Box Field Types; Comma Delimited)
6. Click the Drop Down Area to select a Custom Field Category
*See the following article for a step by step guide: How To: Add Custom Field Categories
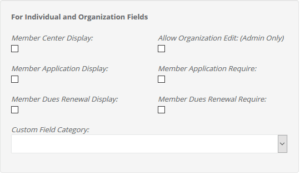
Member Center Display: Select this option to have the Custom field appear & editable the Member Center >> My Profile
Allow Organization Edit: Please contact Support help@amohq.com to have this enabled.
Member Application Display: Select this to have the Custom Field appear on the Membership Applications
Member Application Application Require: Select this option to have this as a required field for the Membership Application.
Member Dues Renewal Display: Select this to have this custom field appear on the Dues Renewal.
Member Dues Renewal Require: Select this to have this custom field required on the Dues Renewal.
List of Answers: Enter options to be selected if the Field Type is set to Single Select, Multiple Select Box.
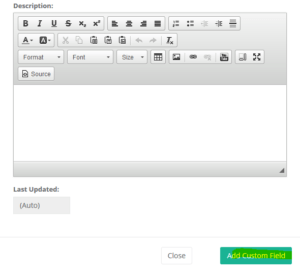
7. Enter a description & Click Add Custom Field
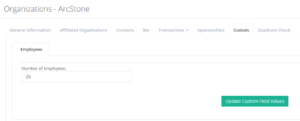
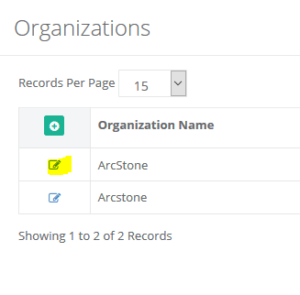
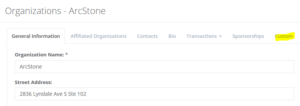
8. To see these Custom Fields, Navigate to Member Management >> Individual / Organization (Depending on Group Selection)
9. Click the Edit Icon next to the Individual / Organization Record
10. Click the “Custom” tab
11. You’ll now see the Custom Fields setup in this area, you can also adjust the values at this screen.